

Add Student
To Add a Student in openSIS, go to Students >> Add a Student. Fill in the demographic information of the student first and click Save & Next. The asterisk marked sections are mandatory. You can give username & password for the student to log in to openSIS for a direct view of his/her gradebook grades, final grades or attendance reports etc.

You will be re-directed automatically to Enrollment Information page since it is mandatory and is equally important for a student to be added in the system. Hence, it is needed to fill in with much attention.
Rolling /Retention Option
This is the most important section for a student in terms of school data rollover & his/her promotion or retention in a grade level.
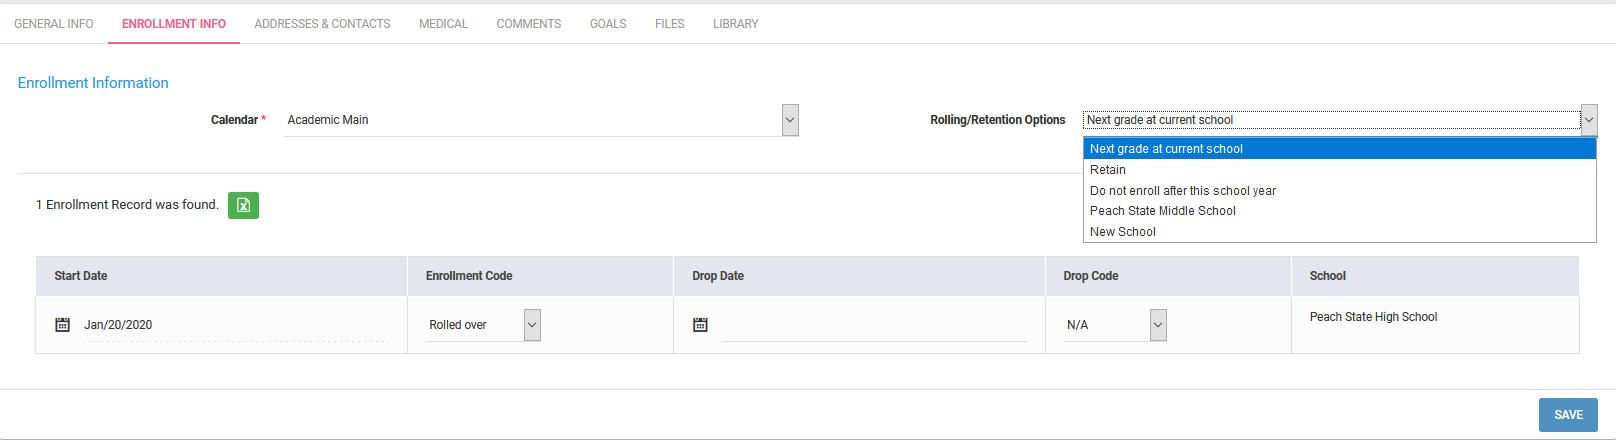
By default this option is selected as "Next Grade at Current School" which means when you rollover the data to the next school year, the student in 1st Grade would be promoted to 2nd Grade in the same school.
By selecting "Retain" you can retain a student (if failed) to the same Grade level he/ she are in after rollover.
If a Student is graduating then you should select “Do not enroll after this school year”, so that the student’s data are not rolled over to the next grade in the coming year.
If you have a multi-school database, you will have the option to select any of those schools from this dropdown list to move the student directly to another school after rollover.
These options should be selected correctly to get the proper student data in the next school year.
Student Enrollment Section
This section keeps the student's enrollment records.

The Start Date indicates the enrollment date; you can give an enrollment code to describe how the student enrolled in your school; for instance, in the image above as per the code the student has been transferred into this school from another school.
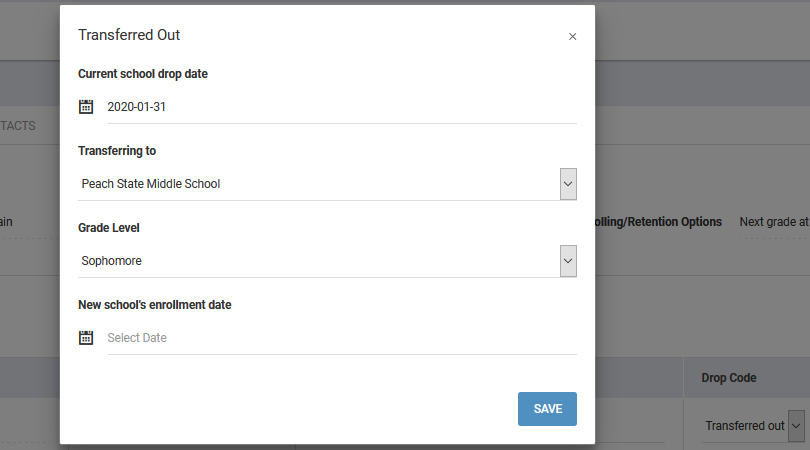
Drop a Student
When you want to drop a student from school, give the Drop Date and select the Drop Code from the Dropdown menu & save the details.
To transfer a student from your school to another school of the same database, select the drop code as Transferred Out & a pop up window will come up with a few details, fill it up & save the data. This will allow you to transfer the student in another school.
After saving the enrollment information, the student is considered to be added in the system.
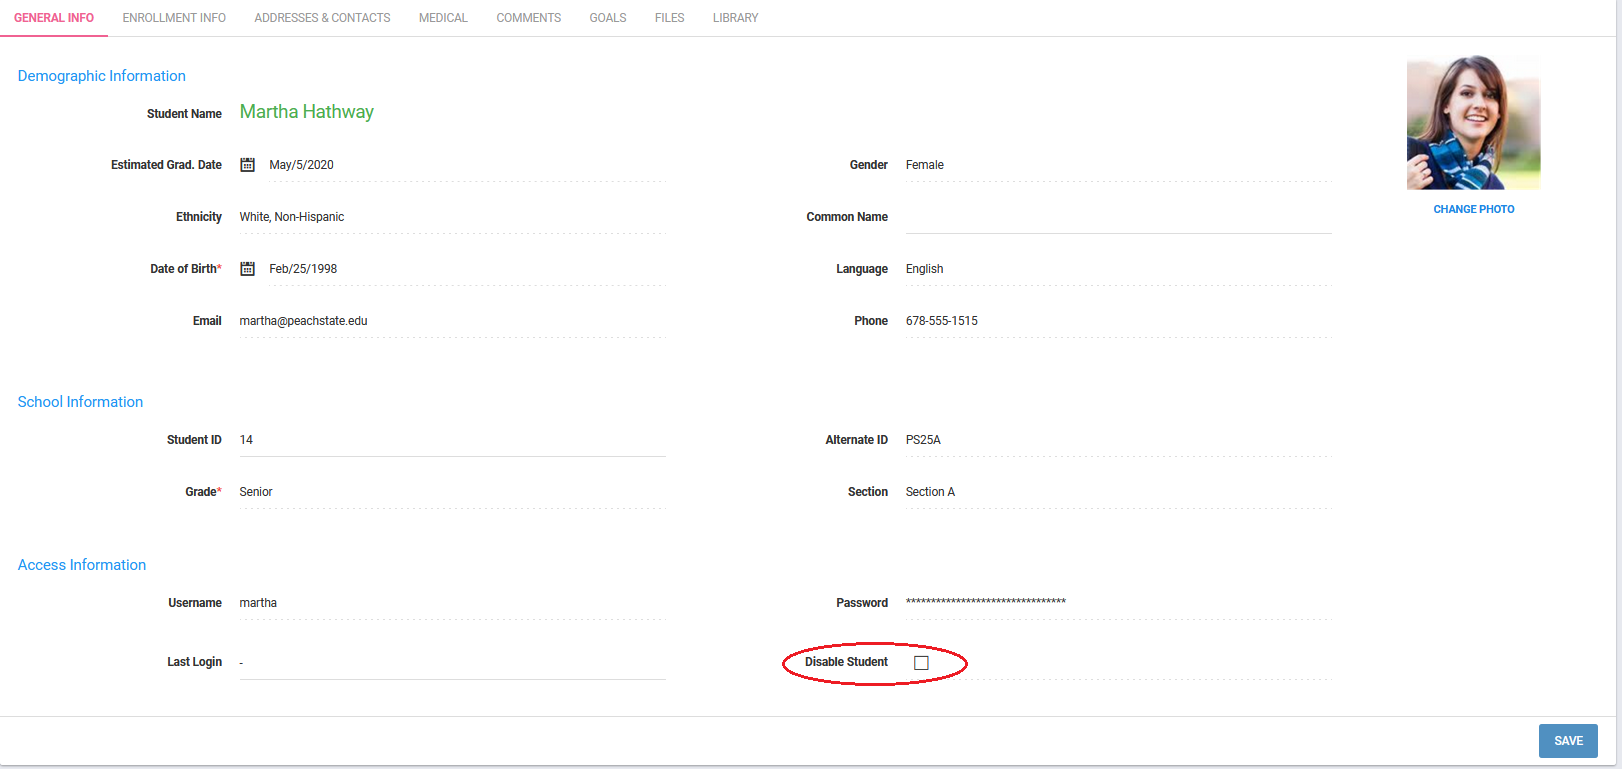
Now, go to the General Info tab to add few more information before proceeding with the non-mandatory information tabs instantly. The option to upload student’s photo appears on the right side in the general Info tab as well as an option to disable the student at the bottom of the page. By clicking on the Upload Student’s Photo, you shall be directed to a browsing option in your computer, select the Student's photo and upload it.
To disable a Student from accessing their individual portal, check the box beside Disable Student option and save it. The student is now disabled and won't be able to log in to openSIS with their password.
Now, proceed with filling in details for the other tabs in the student information.
Student Address & Contact Information
After adding the Student's mandatory details, you can also add their Address & Contact Information by filling up the third tab. Add any number of parents, relatives and legal guardians and capture detailed contact information on each. Added contacts get automatically associated with the student with optional access to the parent portal.
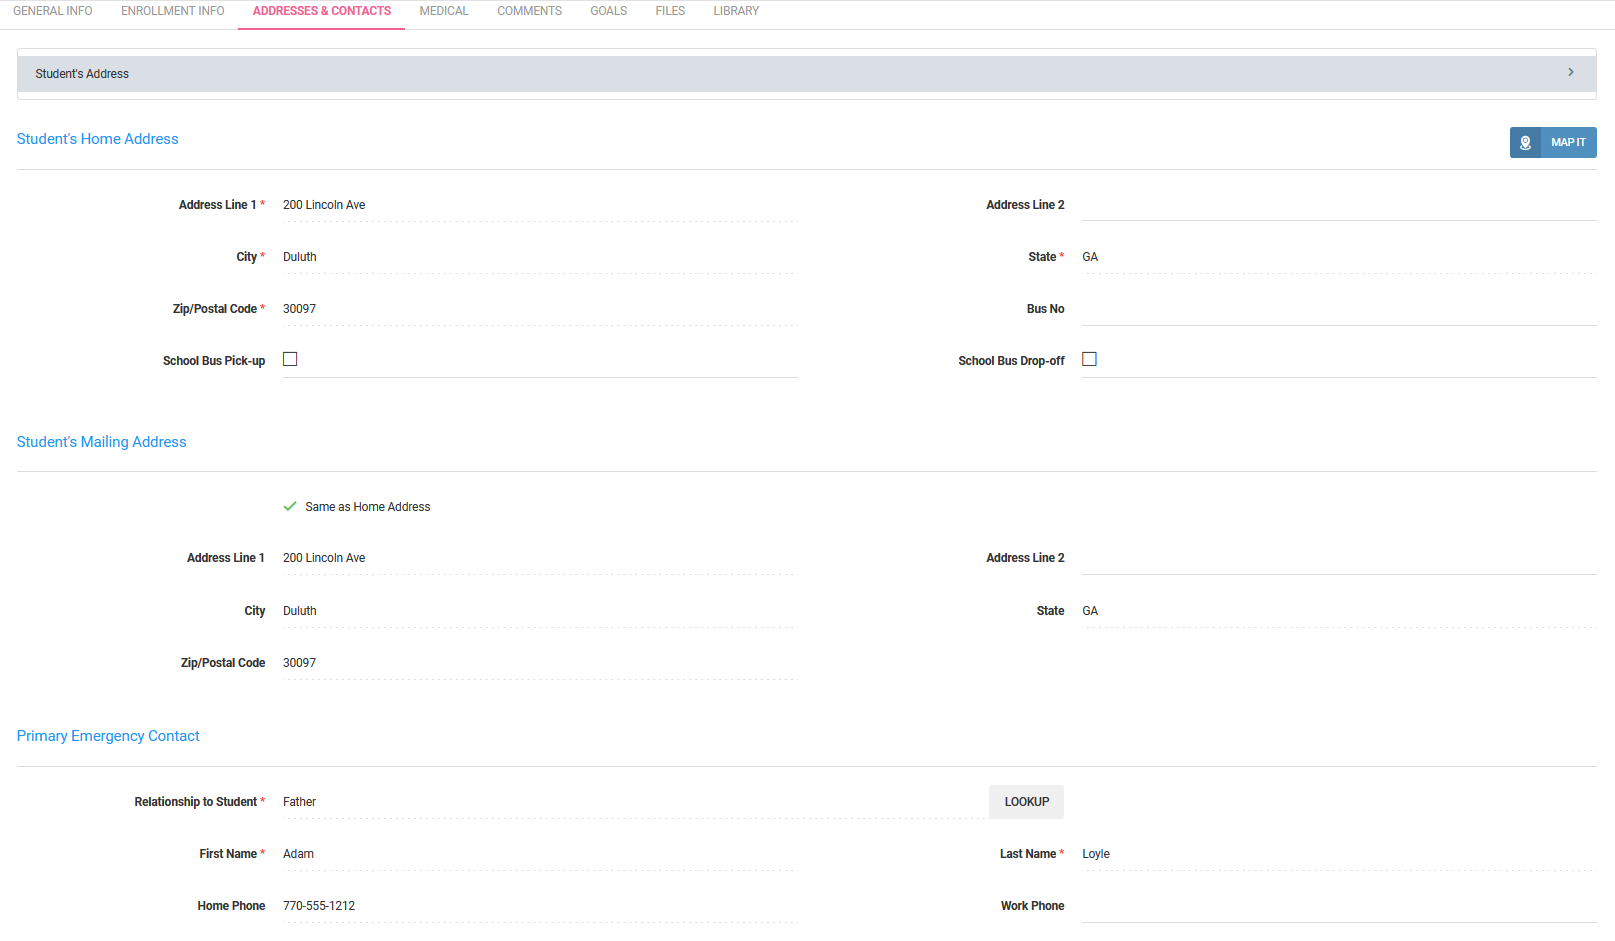
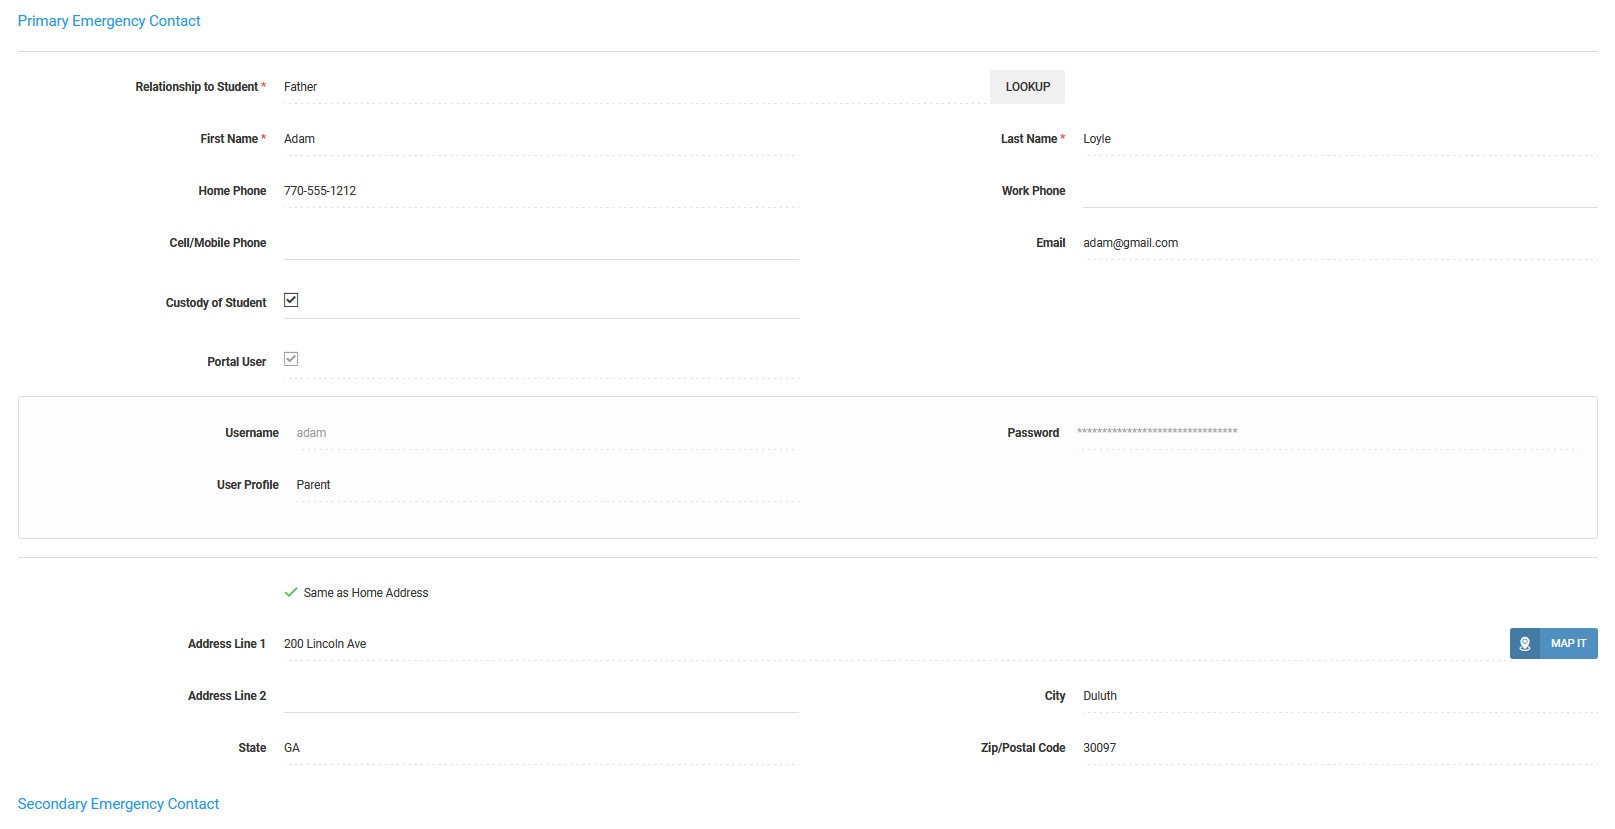
You can also add new address for Student's Mailing, Primary Emergency Contact or Secondary Emergency Contact's address by keeping the ‘Same as Home Address’ radio button unchecked.

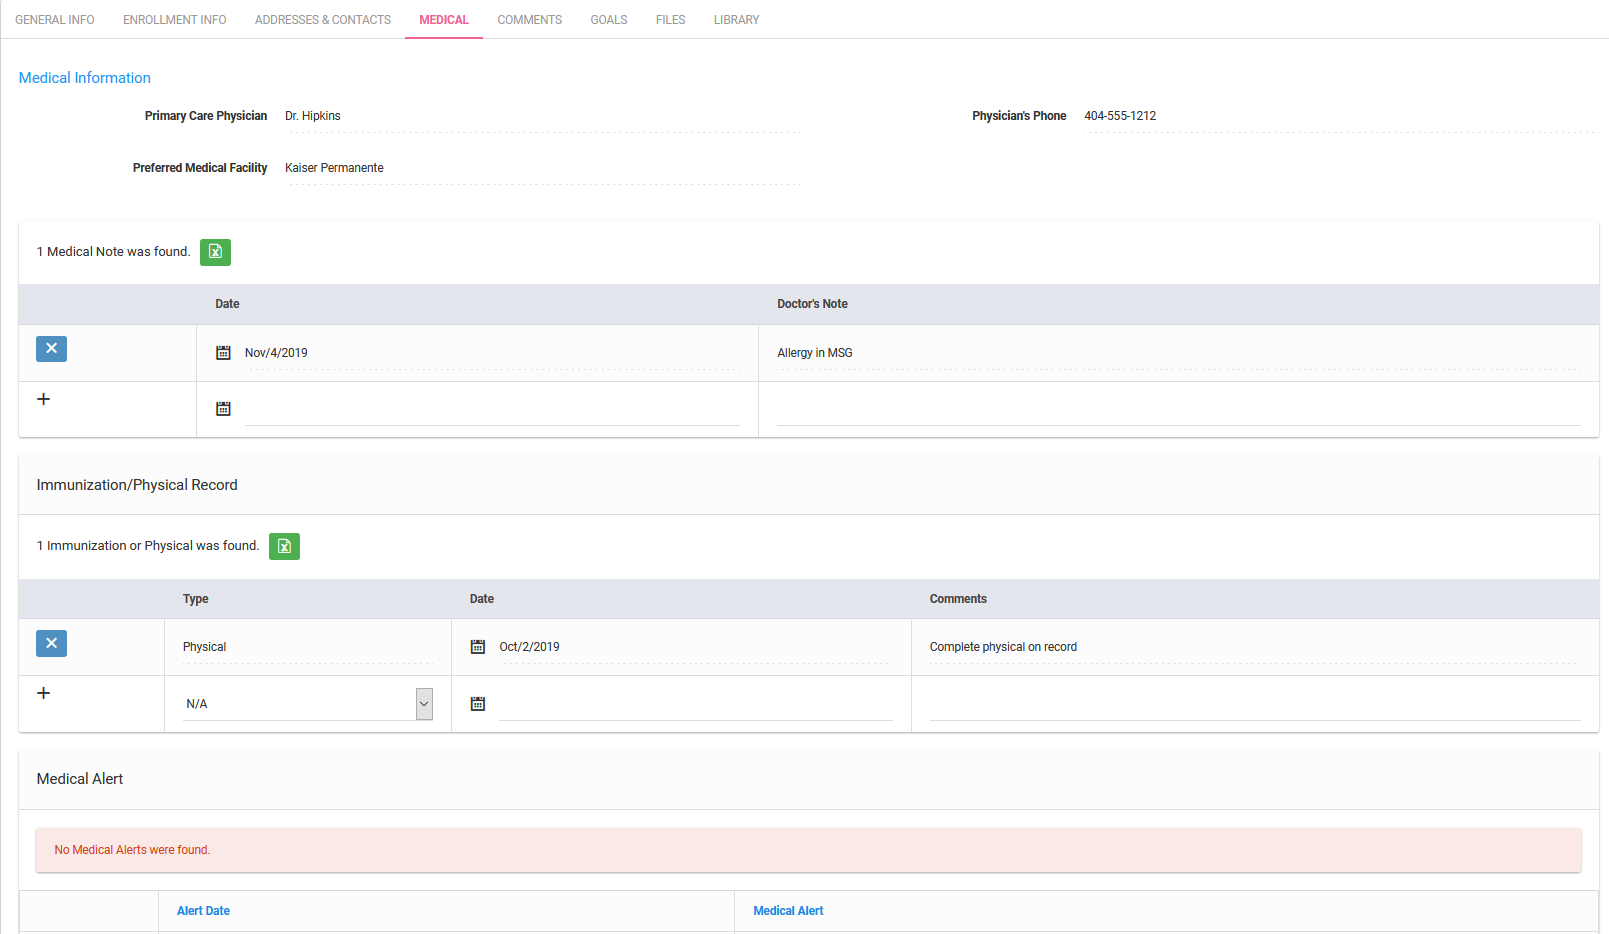
Medical Records
You can also give the student's medical details including Student's health records and preferred physician’s name & number in the Medical tab.
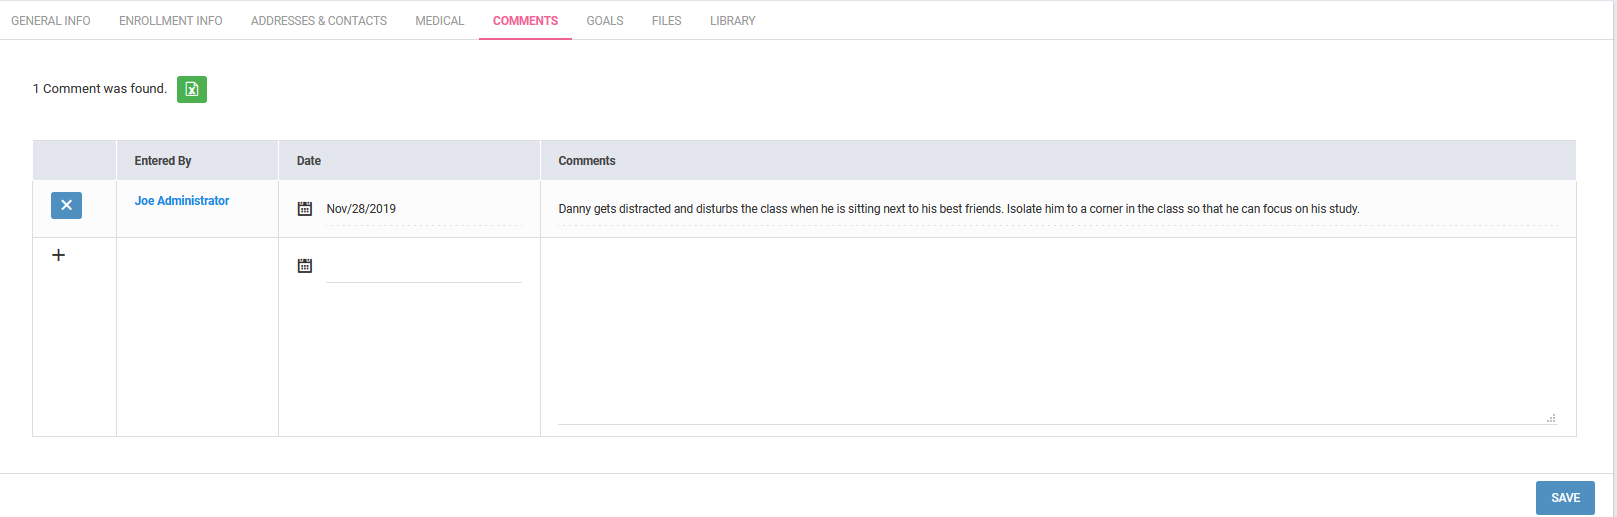
Add Comments
You can add Comments about the student by filling up the Comments Section. It mainly helps to express opinions or as guidance for other teachers or administrators.
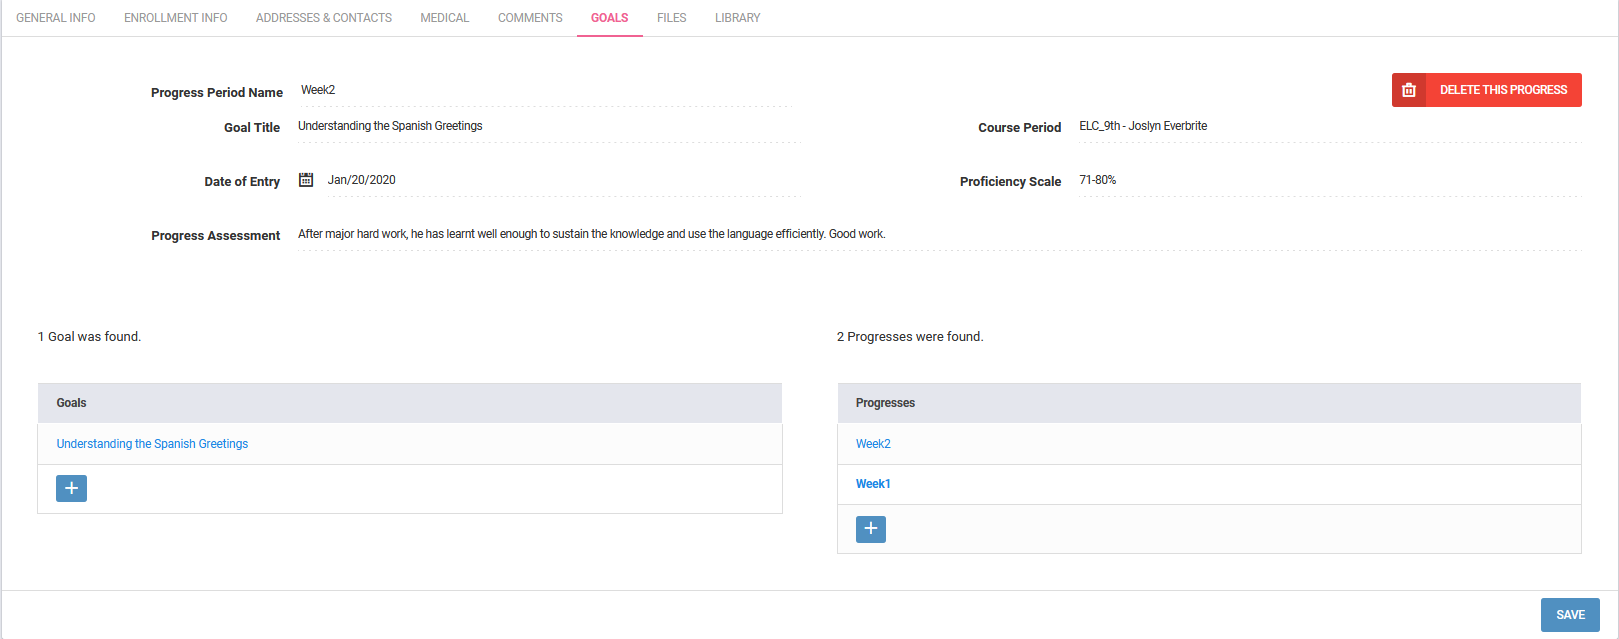
Setting Goals & progresses of Students
You can create Goals and show detailed progress information for a student through this tab. This is used after the school has been set up and the student has been scheduled in a course for which the student can have a goal generated with this option. You may define progress reports at regular interval and record the improvements of the student for it may be used to take it to the parent teacher meeting for meaningful conversations.
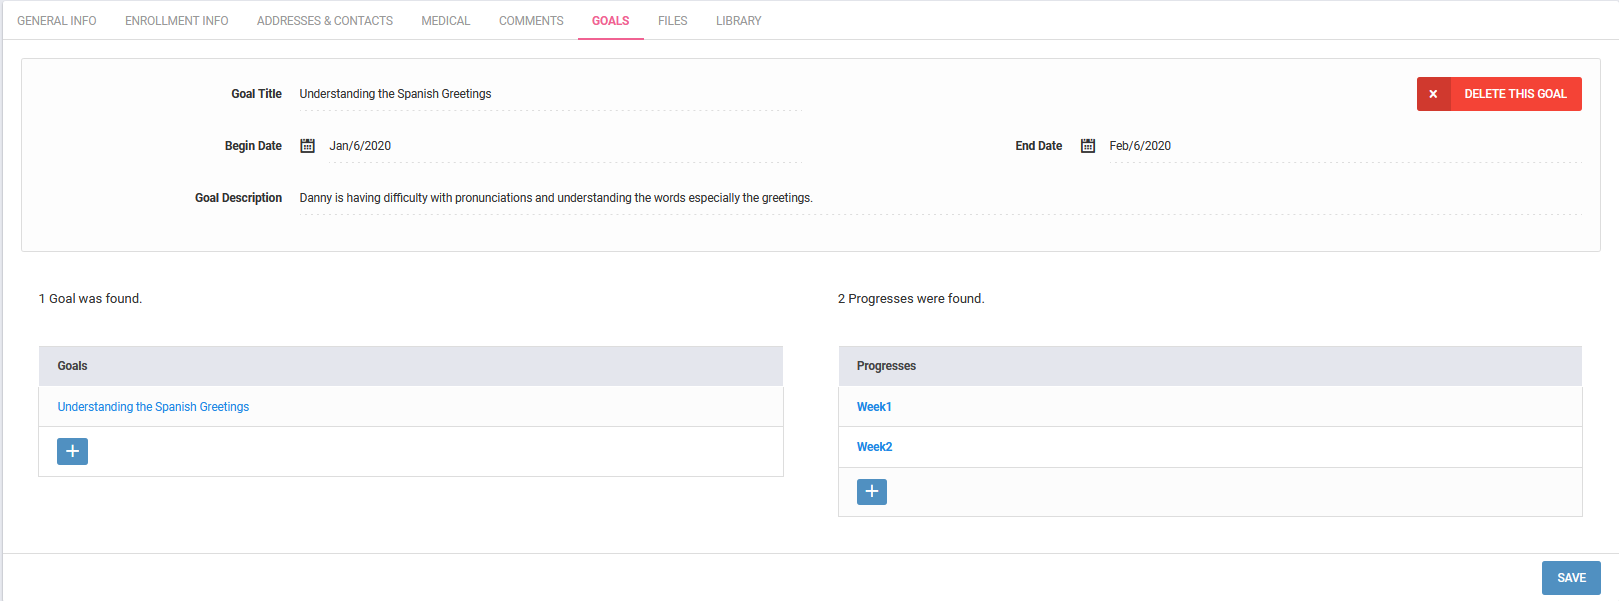
After saving it, the goal is generated. Select the goal and click on the (+) sign under ‘No Progresses found’. Add the progress details with appropriate entry dates, progress proficiency and its assessment and save the report. The progress report will look like the following.
You can also generate Goals and Progress Report from openSIS. It is discussed in the Students >> Various Reports on Students >> Print Goals and Progresses section.
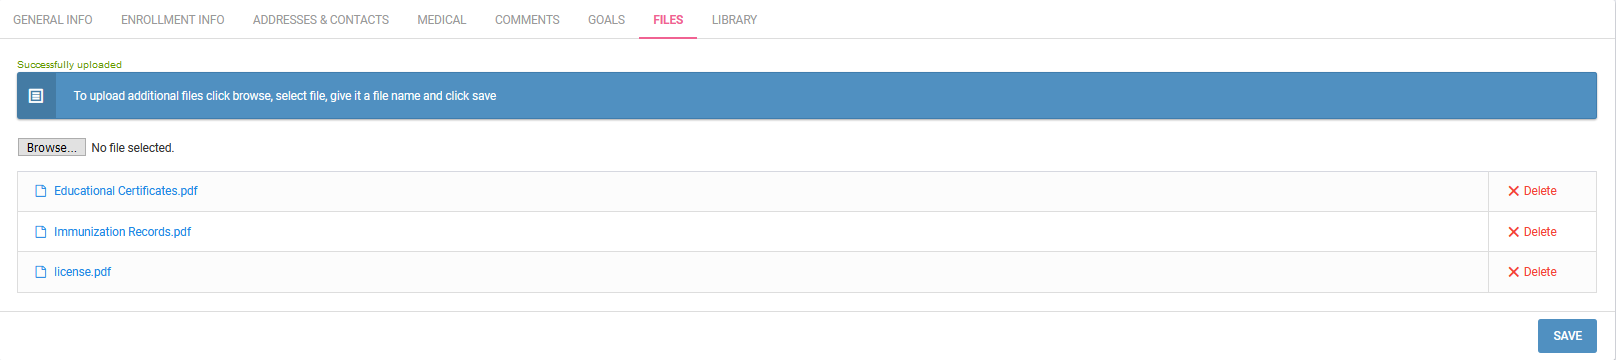
Upload Files
You can upload numerous files documented in various formats such as .doc, .txt, .ppt, .xls, .pdf, .jpg, .png, etc. for the student records.
Watch openSIS tutorial videos in our official YouTube channel
Comments